23. Import As
To test in: Insight and Web (Web - viewing the imported platesimages only)
Purpose of the test is to check the import of data for other users.
NB: Only Administrators can import data for other users. When importing the data for another user, permission to put these data into a third party P/D/S depends on the permission levels of the user for whom the data is being imported ( = the owner of the data).
Check the permission levels for putting the data to other users’ P/D/S (= Mix Data) here.
Read the Table of permissions-users. You will pick or you have been assigned to 3 users from one group.:
an administrator (e.g. user-6)
a user who CANNOT Mix (“No Mix” = NM) - referred to as user-NM from here
a user who Can Mix (CM) - referred to as user-CM from here
both user-NM and user-CM must be members of more than one group (they must share one group, and each be a member of at least one other group as well)
Make sure you have images ready on your local hierarchy. Use small images like
data_repo/public/PNG/and a multi-well plate liketest_images_good/bd-pathway/2009-05-01_000/. You will need to have reasonably named images and plates within reasonably named folders.prepare folders with images for user-NM
prepare folders with images for user-CM
prepare folders with plates for user-NM
prepare folders with plates for user-CM
In Insight UI, prepare Projects and Datasets for the users for whom you will import later. Note that even when you are (later) logged in as admin and Importing As for another user, you can still create P/D/S for that user at import stage (will be tested here further down). These P/D/S will be owned by the user you are just about to Import As. This step prepares P/D/S to cover only the pre-prepared-P/D/S case.
Login as user-NM.
Create a Project and a Screen for the data for user-NM (e.g. “user-NM for user-NM’s data”)
Create a Project and a Screen for the data of user-CM (e.g. “user-NM for user-CM’s data”)
Login as user-CM.
Create a Project and a Screen for the data of user-NM (e.g. “user-CM for user-NM’s data”)
Create a Project and a Screen for the data of user-CM (e.g. “user-CM for user-CM’s data”)
Login as administrator
Create a project and a Screen for the data of user-NM (e.g. “user-6 for user-NM’s data”)
Create a project and a Screen for the data of user-CM (e.g. “user-6 for user-CM’s data”)
Log in as administrator.
Switch to Group Display.
Import for user-CM, do not create a new Project at import stage.
Open Importer, select the folder you prepared in step 3 for user-CM, click
>.In the Import Location window, select
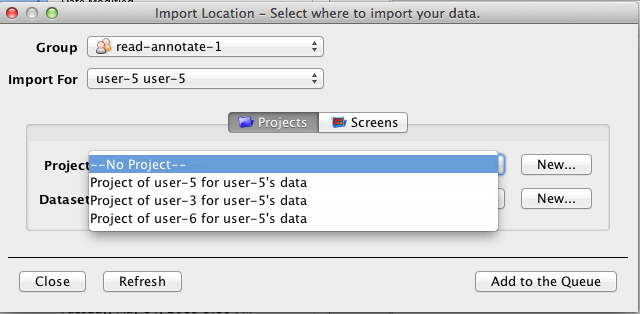
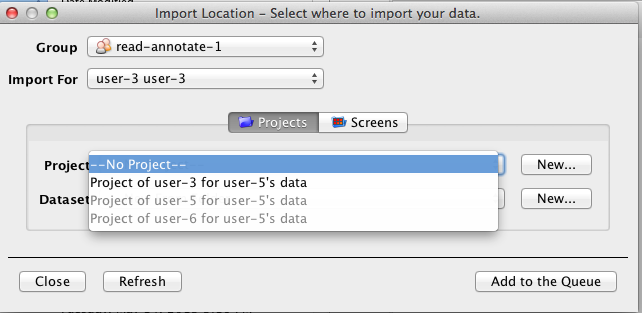
Import Foruser-CM [ImportAs001]Open the Projects menu, you should be able to select the Projects of the user-CM and other users’ Projects [ImportAs002].
- Perform 3 separate imports into 3 different Projects:
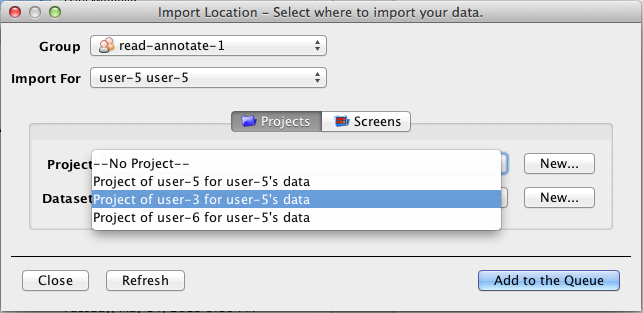
1 Project owned by the user-NM (e.g. “Project of user-NM for user-CM’s data”) [ImportAs002b].
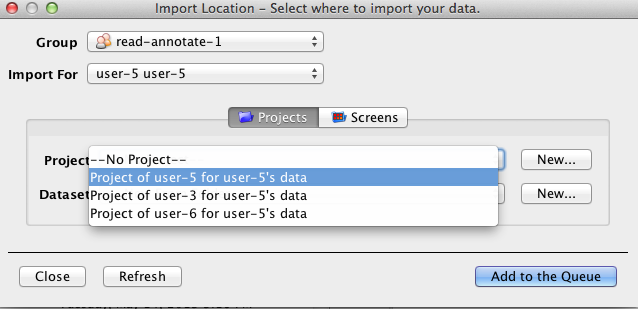
1 Project owned by the user-CM (e.g. “Project of user-CM for user-CM’s data”) [ImportAs002c].
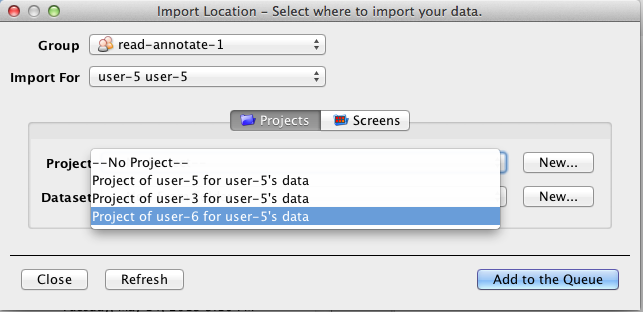
1 Project owned by the admin (e.g. “Project of user-6 for user-CM’s data”) [ImportAs002d]
Switch groups in the Import Location window (selecting the other group user-CM is a member of)
Check that the selection of P/Ds in the other group makes sense = the P/Ds to which user-CM is allowed to put their data into are black, the other P/Ds are greyed out and that you can import an image and put it into one of the black P/Ds
Switch group back to the original one and again Check that the P/Ds in the Import Location selection are black or greyed out as they were before you switched groups.
Import for user-NM, do not create a new Project at import stage
In Importer select the folder you prepared for user-NM in step 3, click
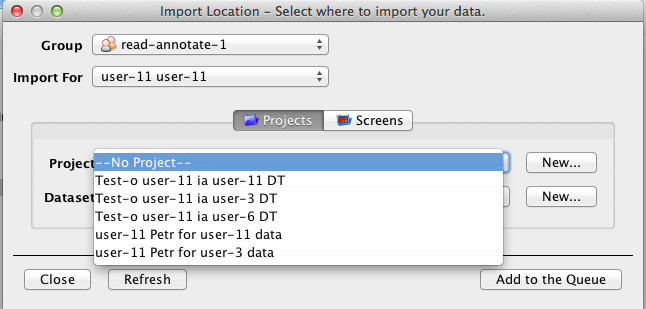
>.Select
Import Foruser-NMOpen the Projects menu, you should see all projects, but not be able to select any Projects except the ones owned by user-NM [ImportAs004]
Select the Project owned by the user-NM (e.g. “user-NM for user-NM’s data”) and import.
Switch groups in the Import Location window (selecting the other group user-NM is a member of)
Check that the selection of P/Ds in the other group makes sense = the P/Ds to which user-NM is allowed to put their data into are black, the other P/Ds are greyed out and that you can import an image and put it into one of the black P/Ds
Switch group back to the original one and again Check that the P/Ds in the Import Location selection are black or greyed out as they were before you switched groups.
Repeat steps 7, 8 importing single images (not a whole folder).
Repeat steps 7, 8 importing plates (small multi-well e.g.
test_images_good/bd-pathway/2009-05-01_000/).Repeat steps 7, 8 creating a new
Project at import stage and importing to it
Dataset at import stage and importing to it
Screen at import stage and importing a plate to it.
Check the imported objects.
Start checking in Web first, then in Insight. View the data logged in as the user who did not import them and does not own them.
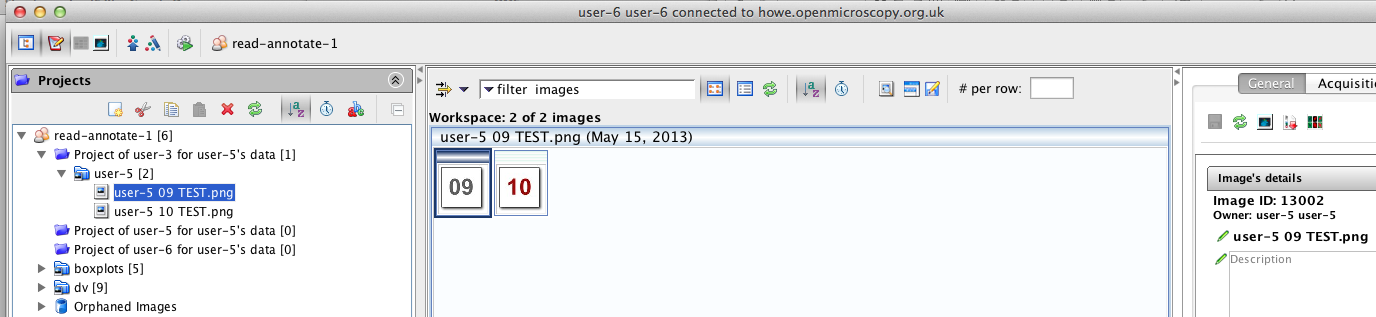
Check that new P/D/S were created and the images and plates were imported as appropriate [ImportAs005]
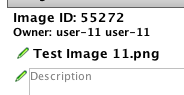
Check that the ownership of the P/D/S and of the imported images and plates is as expected [ImportAs006]
Import now for yourself (=admin).
Switch to private group in Import Location window and Check that you can put your data to your own P/Ds on import.
Switch to all other groups (private, read-only, read-annotate, read-write) and Check that you can put your data to other users P/Ds according to permissions (see the
Mix datarow in here.)
Switch to User Display. The situation in Import Location window should be the same as in Group Display. The P/Ds of the user you are importing for as well as all the P/Ds of the other users which the user you are importing for can put data in are selectable. All the other P/Ds in the group are greyed out, but visible.

ImportAs001
ImportAs002
ImportAs002b
ImportAs002c
ImportAs002d
ImportAs004
ImportAs005
ImportAs006
ImportAs007